Categories
Accepting Online Payments Stripe WordPress

How To Accept Payments With Stripe for WordPress

Are you a freelancer or entrepreneur running a business through WordPress? Adding a payment option right on your website is a great way to increase conversions.

According to a study by the Baymard Institute, 18% of customers abandon their carts due to a complicated checkout process. Adding a payment option to your website instead of redirecting your customers to a third-party payment page will simplify your checkout process and increase your conversion rates.

So, how do you enable payments through your WordPress website?

You’ll need a payment gateway.

A payment gateway is a service that acts as an intermediary for monetary transactions between a buyer and a seller. Payment gateways enable customers to use different payment methods such as wallets, credit cards, debit cards, and bank transfers.

In recent years, many payment gateway providers have appeared on the market. Stripe and PayPal are among the most popular gateways — around 3.2 million websites across the globe use Stripe to accept online payments. Stripe offers easy setup and a flat rate fee, making it an excellent choice for freelancers and other small businesses.

To set up Stripe for your WordPress website, you’ll need to install a To set up Stripe for your WordPress website, you’ll need to install a Stripe WordPress plugin, like Payment Page.

Let’s see how you can use Stripe for WordPress to accept payments and donations.

Here’s what you’ll learn:

Stripe Payment Gateway Basics

Setting up Stripe for WordPress is quick and easy with Payment Page

Stripe is a payment processing platform that lets customers pay on a merchant’s website. When a customer makes a payment on a website, Stripe processes that payment and transfers it to the seller’s account.

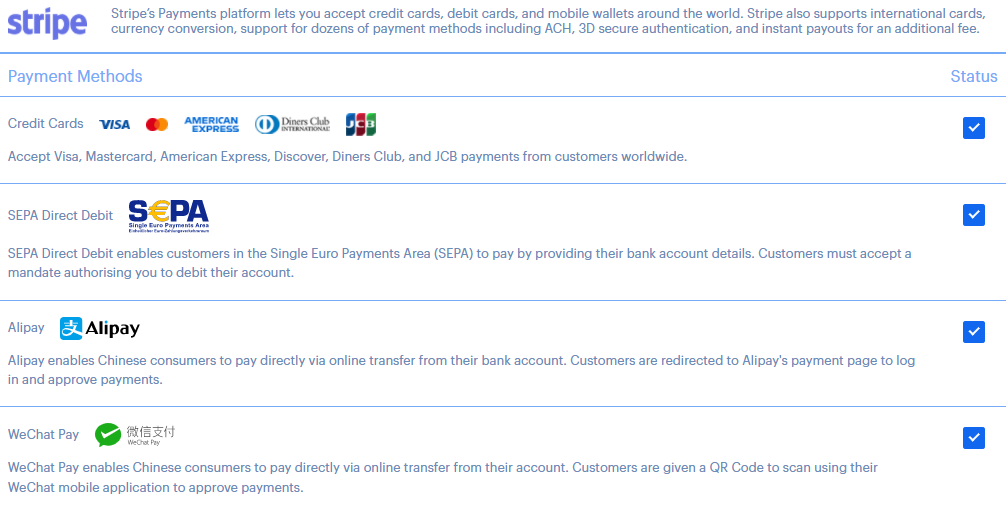
Stripe Supported Payment Methods

Stripe offers diverse payment options, empowering your customers to pay using their preferred payment method.

The Baymard Institute study found that 9% of customers abandon their online shopping carts if there aren’t enough payment methods. While that number may not seem high, why take the risk when you don’t have to?

Offering diverse payment choices by setting up Stripe for WordPress will help your customers quickly finish the checkout process.

Stripe supports a wide range of payment options for online transactions, such as:

  • Credit and debit cards
  • Wallets, including:
    • Google Pay
    • Apple Pay
    • Alipay
    • WeChat Pay
    • Microsoft Pay
    • Click to Pay
  • Bank directs debits and credit transfers
  • Bank redirects
  • Buy now, pay later methods

How Does Stripe Work?

A business needs a merchant account to accept credit or debit card payments. When you use the Stripe payment gateway, you won’t need to open a merchant account as you’ll be using Stripe’s.

Here’s what happens when a customer makes an online payment on your Stripe-powered WordPress site:

  • Stripe encrypts the payment information and sends it to the business’s bank (acquirer).
  • The transaction passes through the credit card network to the customer’s issuing bank.
  • The issuing bank verifies the transaction and transfers money to the acquiring bank.
  • The acquiring bank deposits the money in Stripe’s merchant account.
  • Stripe transfers the money from the merchant account to the online store owner’s account.

Stripe Payment Gateway Fees

Stripe doesn’t have monthly or yearly fees. Instead, it debits fees per transaction. Stripe charges a flat rate of 2.9% plus 30 cents per transaction for online wallets and debit and credit card payments.

For bank account transfers, Stripe charges the below transaction fees based on the type of transaction:

  • ACH credit: $1 per transaction
  • ACH debit: 0.8% per transaction
  • Wire transfer: $8 per transfer

Now that you know how Stripe works, let’s get into how to set up Stripe on your WordPress website.

How To Set Up Stripe on WordPress

After opening a Stripe account, you’ll need to install a Stripe WordPress plugin to start accepting payments on your WordPress website.

E-commerce plugins like WooCommerce come with Stripe integrated. If you don’t want to create a complete e-commerce checkout, go for a standalone Stripe plugin like Payment Page.

Stripe also offers a new payment link feature where merchants can create Stripe-hosted payment links and share them across emails, messages, or chats. Alternatively, you can redirect your customers to a page hosted by a third-party payment gateway.

Let’s look at each of these options in detail.

Standalone Stripe WordPress Plugins

Stripe WordPress plugins are the simplest way to set up a payment page on your website. Some of these plugins offer both free and premium plans. You’ll find two types of Stripe plugins:

Plugins for Payment Buttons

If you have a product page and need simple payment buttons, you can use plugins like WP Simple Pay. Once a customer clicks the pay button, a payment form pops up to collect the customer’s card details.

While these plugins are simple, they offer a very basic payment form. You won’t be able to customize your payment page or collect additional customer information.

Stripe Plugins With Payment Form

If you want to create a beautiful payment page to match your brand, you need to go for form-based Stripe plugins. These plugins will integrate Stripe with your website and empower you to design a customized payment page.

You’ll find several form-based payment plugins like Payment Page and WPForms. Some of these plugins provide a simple form with basic customizations. But plugins like Payment Page offer advanced customization and styling options to create versatile payment pages.

Accept Stripe payments through customizable payment forms.

Top Stripe WordPress Plugins

Here are a few standalone Stripe WordPress plugins that’ll help you enable Stripe payments:

  • Payment Page
  • WPForms
  • PaySimple
  • WP Simple Pay Lite/Pro
  • WP Full Stripe
  • WPSmartPay

Stripe Integrated E-Commerce Plugins

If you’re planning to build an online store with a full e-commerce checkout flow, you can go for WooCommerce or Easy Digital Downloads. These plugins come with Stripe integration.

While this option is suitable for an e-commerce store, building a full-fledged WooCommerce store might be overkill if you just need to offer a few services or set up a subscription service.

Stripe Payment Links

Payment Links is a new Stripe functionality that helps you create a simple payment page hosted by Stripe. You can then share a link to your hosted payment page over email, WhatsApp, or social media channels.

While Stripe Payment Links is a simple option to set up a payment page, you’ll only get limited customization options. Also, a payment page hosted on a domain outside your business’s website might not look very professional.

Link to a Third-Party Payment Gateway

If you don’t want to make changes to your website, you can redirect your customers to a payment page hosted by a third party. While this option is quick and easy, redirecting your customers to a different page may add checkout delays and lead to cart abandonment.

How To Accept Payments on Your Website Through Stripe + Payment Page

Payment Page is a Stripe verified partner.

With Payment Page, you’ll be able to create beautiful, Stripe-powered payment forms that match your brand. Payment Page is a Stripe verified partner vetted by Stripe for security and quality of service.

Payment Page is suitable for freelancers, coaches, NGOs, and other online businesses. With a few simple steps, you can accept donations or create subscription plans.

Here’s a step-by-step guide on how to create a beautiful Stripe-powered payment form:

5 Steps To Set Up a Stripe-Powered Payment Form

Step 1: Download and install Payment Page on your WordPress website.

Payment Page offers a freemium account if you would like to experiment. We also offer Premium, Pro, and Personal plans if you need advanced features. Before starting out, ensure your website has an active SSL certificate for secure data transfer.

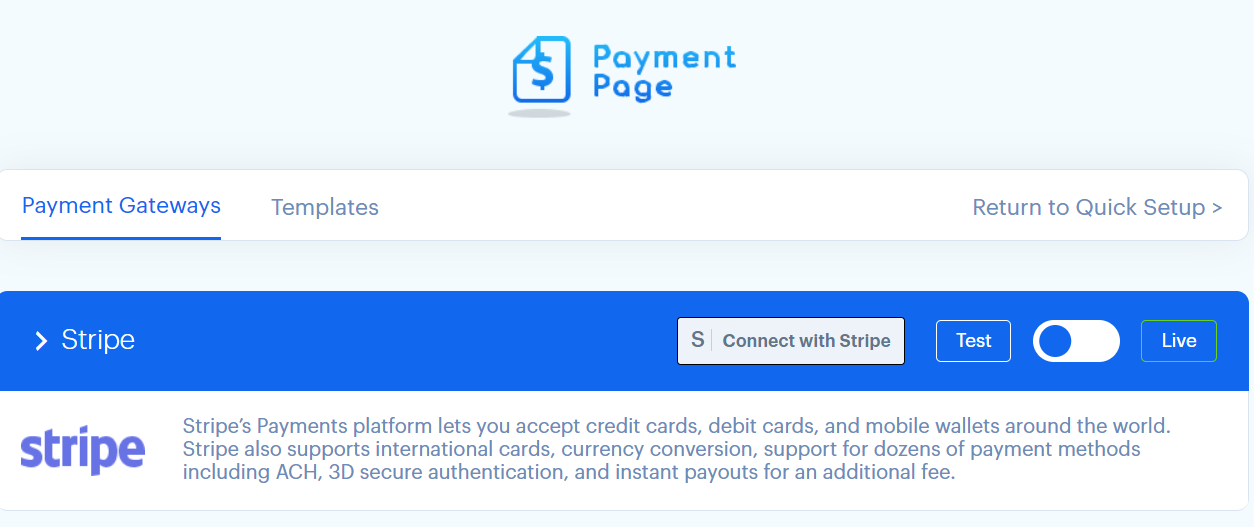
Step 2: Connect your Stripe account in test or live mode.

On your WordPress dashboard, click the Payment Page icon to connect your Stripe account to WordPress. You can connect Stripe in test mode first and if everything looks good, enable Stripe payments using the live mode.

Connect your Stripe account using Payment Page plugin

Step 3: Activate the Stripe payment options you want to include.

Payment Page supports all Stripe payment methods like credit cards, debit cards, and wallets. We’ve also added Plaid + Stripe integration to accept ACH direct debit or credit.

Choose the Stripe checkout options you want to offer

Step 4: Import and customize a template.

Payment Page has 11 stylish payment form templates to cater to any online business — freelancers, NGOs, coaches, agencies, or SaaS. Once you import a template, configure the fields of your payment form and save changes.

Payment Page has 11 beautiful templates, and we’ll add new templates soon.

Step 5: Publish your payment page and start accepting Stripe payments on your WordPress website.

Final Thoughts: Accept Online Payments by Setting Up Stripe for WordPress

Millions of websites rely on Stripe to accept online payments. Creating a Stripe-powered payment page will boost your conversion rate. Stripe is a PCI Level 1 service provider, which means you can trust the service with your customers’ credit card information.

You have multiple options to set up Stripe payments on your WordPress website, such as:

  • Stripe WordPress plugins like Payment Page
  • Stripe integrated e-commerce plugins
  • Stripe payment links
  • Third-party payment pages

Are you ready to take your business to the next level by accepting online payments? You only need a few minutes to set up a highly customized, Stripe verified payment form with Payment Page. Get started today.

Categories
Announcements PayPal Stripe

Here’s What’s New With Payment Page

We’ve got some great news! The Payment Page features we’ve been working on for the past few months are now available. In addition to the much awaited PayPal integration, we’ve added more Stripe payment methods, 11 stylish payment page templates, and a multitude of payment form customization options.

Keep reading to see how these new Payment Page features will help you create a beautiful and effective payment page for your business.

Multiple Payment Gateways are Now Available

Do you have customers around the world who have diverse payment preferences? Our new multiple payment gateway integration gives you access to over 20+ different payment methods to accept payments globally, which can have a strong impact on improving your conversion rates and closing the deal.

As we add more gateways and their corresponding payment methods, we’ll be sure to keep you updated, but here’s what we’ve done so far:

Payment Page Now Supports PayPal

With 426 million active users, PayPal is one of the most popular payment gateways in the world. With PayPal support, you can now make your payment forms truly diverse.

It only takes one click to connect your PayPal account with Payment Page. You can instantly start accepting payments from your customers with the Standard PayPal email checkout flow. Soon, we’ll be adding:

We’ve Added More Payment Methods to Stripe

Payment Page offers multiple payment methods powered by Stripe. You can now create a Stripe-powered payment form with the following payment methods:

  • Credit and debit cards
  • Apple Pay
  • Google Pay
  • Microsoft Wallet
  • WeChat Pay
  • Alipay
  • SEPA Direct Debit
Choose the Stripe checkout options you want to offer

Stripe + Plaid Integration for ACH Debit

We’ve also added the Stripe + Plaid integration, so your customers can now pay directly from their bank accounts using ACH Debit.

Fully Revamped Templates To Support Any Business Niche

Who says online payment forms can’t be beautiful?

At Payment Page, we love creating diverse templates for every business niche, so we’ve designed a collection of brand new stylish payment page templates. From Enterprise SaaS companies to yoga teachers, and freelancers to flower shops, anyone can start accepting payments with our eye-catching templates.

Payment Page now offers 11 exciting templates customized for:

  • Freelancers
  • Consultants
  • Non-Profits
  • Agencies
  • Coaches
  • Online Tutors
  • IT Support Reps
  • Yoga Teachers
  • Flower Shops
  • Content Writers
  • SaaS

These templates are fully customizable with the Elementor page builder, and we’ll be adding support for more page builders soon. We also have several customization options you can play around with and have fun designing your custom payment form.

Payment Page has 11 beautiful templates, and we’ll add new templates soon.

Plus, we’ve created a new settings user interface and first time user experience so you can quickly onboard your payment gateways and select a template.

New Customization Options for Payment Forms

Payment Page offers tons of customization options for payment forms, and we’ve added some more, like:

  • Drag-and-drop to reorder form fields.
  • Form field column width customization for up to 6 fields on a single row.
  • Responsive settings to adjust the column width on mobile.
  • Custom form fields.
  • Custom dependent fields based on pricing plans or payment methods.

Want us to add a specific feature or another Stripe payment method? Vote for a product idea or reach out to us through our suggestions page, and we’ll add them to our Roadmap. We’re eager to hear from you and love community requests!

Categories
Announcements Stripe

Payment Page is now a Stripe Verified Partner!

We’re excited to announce that Payment Page has become a Stripe Verified Partner!

What does being a Stripe Verified Partner mean?

Our team is thrilled to achieve this milestone because Verified Partners undertake a rigorous security and verification process, so that everyone can be confident in the quality of a partner’s integration with Stripe.

Our team at Payment Page can now provide better experiences for our amazing customers because we have access to partner webinars, exclusive invites to product betas, and dedicated support to streamline issues.

Here’s our Stripe Partner Program listing.

Learn more about getting started with Payment Page on Stripe’s website.

About Payment Page

Payment Page helps small businesses get paid online with beautiful and fully customizable payment pages. Host your page with us, build your own page with our WordPress Plugin, or even create payment pages for your multi-vendor marketplace.

About Stripe

Stripe is a technology company that builds economic infrastructure for the internet. Businesses of every size use the company’s software to accept online payments and run technically sophisticated financial operations in more than 100 countries.
Categories
Stripe Tutorials

How to Accept Bancontact Payments through Stripe: A Guide

When running an eCommerce store, transaction options are one of the biggest factors determining whether or not a customer will go through with their purchase. While website design provides visitors the opportunity to experience your brand and the products they put out, a hosted payment page system will allow them to turn that into reality. 

Payment page builders are extremely important for a streamlined checkout process. However, their importance is not stressed nearly enough. Offering a variety of payment options on a clean and easy-to-use payment page ensures that customers aren’t given a reason to leave. In a world where hundreds of other options are available at their fingertips, you can’t afford to lose them.

Bancontact

Bancontact is Belgium’s leading online payment method, in which it is utilized in up to a third of their online transactions. Founded in 1979, they have since been able to expand their reach and create a network for payments that work for the Belgian people. It is estimated that only less than 20% of businesses in the country do not offer the hosted payment page technology and it is reported that 27 million payments were processed in 2015. 

Bancontact payment details are normally single use but can be programmed to allow businesses to retrieve the bank account details of customers for subsequent payments to be completed. This can be done with the appropriate mandate authorization and links to the SEPA Direct Debit system for easy access. 

Fast Facts About Bancontact

Bancontact is a Belgium-based company that accepts payments via an authenticated bank debit system. Thanks to its customer-authenticated system, this offers safety and security for transactions, providing users with peace of mind. Since it accepts Euro currency, this is best suited for European Union countries looking for a good way to integrate this program with a Stripe payment system. Additional features include an immediate payment confirmation, as well as the ability to handle both refunds and partial-refunds in case of any issues. 

One of our favorite Bancontact features is its ability to set up recurring payments through SEPA Direct Debit, making subscriptions incredibly easy!

How To Accept Bancontact Payments Through Stripe

If your e-commerce site has a hosted payment page, Bancontact can be chosen as an option for checkout. There are two potential next steps, the first being when the customer is redirected to Bancontact’s page for payment credentials to be entered, which will notify the customer once the payment process has been completed. After the completion of this process, the customer will be returned back to the business’ site for the order details and other information. 

The other potential next step occurs when someone already owns a Bancontact account. First, the option is selected at checkout, then is redirected to Bancontact’s site containing a QR code to be scanned. The user will then enter their pin code and will be given a notification that the payment has been completed and will redirect them back to the business’ website. 

These can be integrated into Stripe’s system through proper programming and customization. 

What About Disputed Payments?

Thanks to the requirement of bank authentication for payments, the risk of fraud, or other kinds of unrecognized payments is low. This means that there will be no disputes that turn into chargebacks with funds withdrawn from a hosted payment page system (e.g. Stripe).

How About Refunds?

Bancontact payments have a refund period of up to 180 days after the original payment date. 

Advantages Of Using Bancontact As A Hosted Payment Page System

The best feature of the application is real-time confirmation and the guarantee of payment. For Belgian residents, this system is familiar, secure, and is extremely easy to use for any kind of customer. Additionally, the mobile application is well-optimized and is well integrated with online and mobile banking. 

Advantages For Merchants

Similar to the advantages for customers, Bancontact provides real-time payments that are low to no-risk and is a trusted payment solution by all of Belgium’s major banks. Because of this trustworthy and well-optimized system, sales are a breeze! The automatic enrollment system that utilizes QR codes and the application on mobile to make payments further expedites the process of making a purchase.

Conclusion

Hosted payment pages are important in running an eCommerce business, which is why investing in a premium payment page is worthwhile. The general rule of thumb is that the more steps a customer needs to take to buy something online, the more likely they are to abandon their cart. By utilizing streamlined payment pages like Stripe or Bancontact, the transactions made are easier and will make people think less about buying things from your store. 

Payment Page is a premium payment page builder that aims to assist international businesses of any scale craft easy-to-use and hassle-free checkout processes using apps like Stripe. We believe that the biggest factor that hampers an eCommerce store’s ability to sell all over is the lack of proper payment page builders, which is why we are here to help.

Categories
Stripe Tutorials

How to Accept Giropay Payments through Stripe: A Guide

Giropay is a bank debit payment method used in Germany. Nearly all German banks link with it, including Sparkasse, Volksbanken, GLS Gemeinschaftsbank, Deutsche Kreditbank, Bankhaus Ellwanger, Bankhaus Bauer, and more. It lets customers transact online and pay through their savings or debit account.

Customers verify payments through this option with either a two-factor authentication system or a PIN. Paying through here is suitable for business models that need guaranteed payments. Once the customer has verified his security details, the funds are automatically transmitted. This method is similar to Bancontact from Belgium, Malaysia’s Financial Process Exchange (FPX), and iDEAL, from the Netherlands.

How to transact online through Giropay

Using this payment method is straightforward and does not take more than five steps. An e-commerce store looking to present it as a choice for customers can use a payment page builder to integrate it with their store.

  1. First, the customer lands on the checkout screen at the merchant’s website. When he selects Giropay as the payment option, he will be redirected to the page for finalizing payments.
  2. On Giropay’s page, he enters his bank details and confirms the purchase. Once he has done this, he will receive an SMS with his authentication number.
  3. The user enters the number into the redirect page, and hits send. Instead of two-factor authentication, some people get a second redirect to their bank’s website, where they will input a PIN they have set for online transactions.
  4. After confirming the purchase a second time, the Giropay redirect screen will confirm that the payment is complete.
  5. Some merchants redirect the shopper back to their website after this entire process. If he has an account with the e-commerce site, he can view their order’s progress.

What are the benefits of using this method?

Giropay serves as a gateway, letting customers transfer funds between local banks or purchase online via bank transfer. The system uses AES 256-bit encryption with TLS 1.2, which means your money will be safe when you use this method.

Payments made through this option are free for the customer since these are coursed through their banking partner. Furthermore, Giropay can be integrated with international money transfer services like Skrill and PayPal, which lets users enjoy greater flexibility, especially when purchasing items from international sellers.

How secure is Giropay against fraud?

Fraud and unrecognized payments are unlikely with this method since the customer is the one who authorizes the transfer of funds. Since there are no recurring payments, there is no dispute process that might result in a chargeback and withdrawing of funds.

If one happens, a dispute is likely to be between the customer and their bank and will be handled between them. There will be no dispute information on the dashboard.

Are refunds possible on this platform?

You can apply for refunds for transactions completed through Giropay, but there is a window for it. Applications for a refund may only be processed within 180 days from the original charge date. After this, the user can no longer refund the charge.

Conclusion

Giropay is a secure and reliable way to transfer funds. Integrating this payment method will give Europe-based customers more options for transactions and personalizes their e-commerce experience.


Payment Page helps you tailor your audience’s shopping journey to your e-commerce store. Create a hosted payment page to integrate with your WordPress website and make online transactions easier than before. Join us today or get in touch for more details!

Categories
Stripe Tutorials

How To Accept iDEAL Payments Through Stripe: A Guide

Ever since it was first used as an experimental addition in the transaction flows of small Netherlands-based businesses, iDEAL has become one of the frontrunners of European online payments.

With its simplistic system that seeks to quickly complete transactions through an authenticated bank debit, iDEAL makes online payments easy. Thanks to its user intuitive system and immediate payment confirmation, iDEAL has managed to become the most popular online payment method among the Dutch. This is evident in its 55 percent market share! 

Seen as the Dutch counterpart of other popular payment methods such as Giropay and Bancontact, it’s clear that this tool has become highly sought-after for the right reasons. 

If you’re an online seller looking to offer as many European payment options as possible, this Dutch-developed payment system is a must. Fortunately, integrating it is as easy as accepting iDEAL payments via Stripe!

A Step-By-Step Guide To Accepting Payments Through Stripe

Although it may seem quite complex, fine-tuning your website’s payment pages to accept iDEAL payments doesn’t have to be as difficult because Stripe has streamlined the process through its Sources tool.

With the help of this single integration path that seeks to create payments using any supported method, Stripe users in the United States (and Europe, as well) can quickly accept payments from Dutch customers. This tool is set to help ease up the process because a Source object can be created so that a customer is redirected to their bank’s website to make a charge request— thereby completing the payment. 

Let’s go over each crucial step that you’ll need to follow so that you can use Stripe (and the Payment Page builder tool integrated with it) to start accepting iDEAL payments: 

Step #1: Create a Source object that will start accepting payments

The first step you’ll have to take is to create a Source object on the client-side—a process that can be found in the iDEAL Bank Element Quickstart. With this step, you can help your customers streamline the payment process by selecting their bank online instead of browsing the interstitial bank selection page.

Step #2: Have your customer authorize the payment

Once you’ve set up the source object that will be responsible for accepting payments from the most popular method in the Netherlands, the next step is to have your customer authorize them.

When you create a source, its status is initially set to “pending”, meaning that it cannot be used to make a charge request. This is where your customer will have to authorize an iDEAL payment to make the source object chargeable— which can be done by linking them to the URL provided within the Source object’s “redirect[URL]” attribute. 

Step #3: Start charging the Source

After following the two steps mentioned above, you’ll notice that your assigned Source object’s status is now “chargeable” and no longer “pending”. This allows it to be used to make charge requests. To make a charge request using the allotted source, you can proceed with making a charge request by accessing the webhook handler and using the source ID as a value in the source parameter so you can complete the payment. 

Step #4: Make the confirmation that the charge has succeeded

By the time everything falls into place and the Charge in question succeeds (which will show in the form of a “charge.succeeded” webhook event, the final step that you’ll need to take is to notify your customer of the successful transaction. 

(For a more in-depth guide to integrating iDEAL payments using Payment Page’s integrated payment method, check out Stripe’s official guide here.)

Conclusion

Trying to meet the needs of consumers in the Netherlands entails giving them payment options that make completing a purchase easy. If you see Dutch customers visiting, yet to bounce and abandon their cart in the latter stages of a purchase, your payment options could very much be the reason. With the help of this guide, however, you can quickly and successfully tap into the Dutch market by accepting the country’s leading payment method through Stripe!


If you’re looking to accept iDEAL payments through Stripe with an appealing and effective form on your website, then Payment Page is for you. You can easily build a custom payment form or we can help you set it up, to help your business achieve more profit right away with our tools at your disposal. Get in touch with us today to see how we can help!

Categories
Stripe Tutorials

How to Accept Klarna Payments Through Stripe: A Guide

Klarna is one of the largest Swedish banks today, offering online banking payment options to 85 million consumers through 200,000 merchants. The bank is in 17 countries, including Austria, Denmark, Finland, Germany, Norway, The Netherlands, the UK, and the US. Some of the world’s largest brands integrate with Klarna, including Timberland, Sephora, H&M, The North Face, and more.

One of the biggest draws to Klarna is how many choices it offers to customers regarding payment. There are three different payment options you can integrate using a payment page builder—Pay Later, Pay Now, and Slice It. With all of these options, the bank enables upfront payments, protecting both the customer and the merchant against fraud. 

Choosing Pay Later for Klarna

Pay Later allows a shopper to complete a transaction and defer the payment for a couple of weeks. He is usually given 14 to 30 days to settle the full amount. When the customer selects Pay Later, he will undergo the following process:

  1. At the e-commerce store’s checkout screen, he chooses Pay Later as his transaction option. Then, he is redirected to the hosted page.
  2. At Klarna’s redirect page, he may be prompted to enter additional details like his birth date. After this, his order goes to the next step.
  3. The bank runs an automatic credit search using his bank details and the information he supplied on the redirect page. Once it finishes, the purchase is approved.
  4. The browser automatically redirects to the merchant website, where the user could see that the order is complete.

Choosing Pay Now for Klarna

If the customer wishes to pay at the instant that he transacts, he can choose Pay Now. This option accesses credit stored in a digital wallet; he can facilitate bank transfers or card purchases through it.

  1. At checkout, when the customer chooses Pay Now, his browser will redirect to the Klarna hosted page.
  2. If he is a new user, he will get a window prompting him to enter his account credentials. If not, he can use his previously saved information to go to the next step.
  3. Klarna confirms the transaction and debits the digital wallet. Then, the customer’s browser returns to the merchant’s website.

Choosing Slice It for Klarna

If a customer wants to make staggered payments, he can choose Slice It, which enables him to pay for the item over a period. There are various installment plans, allowing the shopper to select a payment scheme that fits his budget.

  1. A customer can select Slice It at the checkout screen, which will redirect him to Klarna’s hosted page.
  2. Once he is here, the shopper can choose the installment plan that best suits his budget. The bank offers anywhere from three to 36 months to pay, with varying interest rates.
  3. After he confirms, the browser will ask him for additional details, which the bank uses for its instant credit search.
  4. If the transaction is approved, the browser redirects to the merchant’s website and completes the checkout.

Conclusion

Klarna lets your customer choose the payment option that suits his budget. Payment confirmation is immediate for Pay Now in all regions. For most countries, Slice It and Pay Later are also immediate. In the US and the UK, merchants get a temporary confirmation, and the payment clears after five business days. Overall, it gives customers a simple, flexible way to shop on your website.

Make shopping a breeze with Payment Page. Provide your customers with various transaction modes through a hosted payment page, which integrates with a WordPress site. Join us today or get in touch for details!

Categories
Stripe Tutorials

How to Accept Multibanco Payments through Stripe: A Guide

In a digitally-oriented and fast-paced business landscape, every day feels like a race against your busy schedule. Daily tasks like withdrawing money, depositing, or paying the bills can feel like a major hassle, but fortunately, advances in the banking industry simplify payment methods for people. 

That’s why online businesses are integrating  payment gateway methods in their system to make transactions more convenient for customers, allowing eCommerce businesses to grow rapidly on a worldwide scale. Payment processors dominate the international market, but what about integrating payment methods like Multibanco to your store? 

What is Multibanco?

Run by Sociedade Interbancária de Serviços S.A. (SIBS), Multibanco is one of the most innovative interbank networks in Portugal. It’s a revolutionary system that takes convenience to the next level for customers as it links ATMs of 27 banks in Portugal, making it easy to pay bills and other transactions using the ATM or online banking. 

When linking it to your e-commerce store, Stripe will receive the funds sent by the customer using Multibanco, which can take a few days to complete. When sending payment through online banking, the following steps take place: 

Online Banking From Multibanco to Stripe 

Step #1: Create a Source Object

If you’re looking to cater to customers in Portugal, using Sources is key to create payments that are supported by your store. Using either Stripe.js or source creation endpoint, these JavaScript libraries are platforms where you can build payment flows for your store. 

Step #2: Have the Customer Send the Funds 

Moving forward, clients or customers from Portugal can send their funds straight from their bank using either a reference or entity numbers you provided. They can initiate the transfer using either their computer, phone, or local ATM, which the merchants will display in the checkout flow and order confirmation email once the customer is pushing through with the purchase. 

As for the client, the source you created will only be set to pending, but it will change into chargeable once the customer transfers the funds. Be sure to charge the source to complete the process, or else the status will immediately cancel by default after six hours. 

Step #3: Charge the Source 

As mentioned above, the source’s status will change to “chargeable” once the customer pushes through with the transaction. It can take anywhere between minutes to days for the customer to send the funds, which is why it’s crucial to integrate webhooks to your system too as this can notify you about the changes to your source’s status. 

Once you do confirm the status change, you can set it to “charge” to complete the process. 

The Bottom Line: Payment Page Simplifies the Process of Accepting Multiple Payment Methods Across the Globe 

Bank payments and digital wallets are at an all-time high, but now online shopping is easier than ever as payment gateways like Stripe bridge the gap between businesses and foreign markets. Unfortunately, integrating different payment methods to your store is not as straightforward as it seems.
The process can be complex for you and your customers, especially when it comes to creating a seamless and easy-to-navigate payment checkout process. That’s where Payment Page comes into play, coming to you either as a WordPress plugin or a Website-as-a-Service (Waas). With our help, we can make the payment process and page setup easy in just a few clicks.

Categories
Stripe Tutorials

How to Accept Przelewy24 Payments Through Stripe: A Guide

Przelewy24, also known as P24, is a payment method hailing from Poland. It’s regarded as one of the most preferred payment methods in the country, as it is tasked to facilitate transactions and fund transfers between 165 major Polish banks and businesses. Polish regard the payment method highly, especially since it allows them to pay for online transactions using direct online transfers from their bank accounts. 

The platform is also highly secure, as it ensures a 3D customer-authenticated payment completion. Payment confirmation is also immediate and should any issues arise, refunds and partial refunds are readily available for customers. Seeing as the Polish prefer P24 as their preferred method of payment, reaching this target market requires you to adopt Przelewy24 on your business platform. 

The question now stands: how do you do it? This guide seeks to help you understand exactly just that. Through Stripe, you’ll be able to offer P24 as online payment, further winning the engagement of prospective Polish customers. Here’s how:

How will it work for my business and potential Polish customers?

Step 1: Your customers will be directed to your checkout—Stripe will then enable them to select Przelewy24 as their preferred method of payment. 

Step 2: To pay with P24, they will then be led to another secure online environment. Here, they will be asked to authenticate their payment by logging into their respective banks. Account credentials will be inputted, to be then secured through the 3D authentication method. 

Step 3: Once the customer’s details are verified, they will receive a confirmation of the payment being successfully completed. Funds will then be transferred to your business, and the rest of the buying process will ensue. 

Note: Depending on your website’s structure, your customer can either be redirected back to the checkout site for confirmation. Refunds will also depend on your platform, as Stripe and Przelewy24 only serve as third-party payment gateways. Reversing funds fall entirely on the customer and business involved. 

Are dispute payments common? What are the risks involved?

Given Przelewy24’s nature, fraud and unauthorized payments are rare. Customers are required to authenticate their details upon payment, which is directly linked to their personal bank accounts. Due to this, cases of disputes rarely ever happen, but should the issue arise, a chargeback will ensue, to be withdrawn directly from your Stripe account. 

What else should I know about Przelewy24?

Przelewy24 operates under a time out method, meaning that shoppers are only given 15 minutes to complete their transactions. This is counted from the moment they enter the P24 payment page, including the choice of bank and re-direction to the said bank. 

Users are also given the chance to pursue an offline payment transaction, however, but will also be strictly under the 15-minute grace period. With that being said, merchants are advised to let their shoppers know accordingly—payments must be done immediately, or else they risk causing problems upon missing the time-out process. 

Enlist the Help of A Hosted Payment Page

Business owners in the modern world face a big problem—with such a competitive marketplace, ensuring that customers choose their brand can be difficult to accomplish. By choosing diverse payment options, however, you’re able to convince your customers to do more business with you. 

Such is the case with Przelewy24—as the leading payment method in Poland, you now open doors of opportunity to further your business reach. All it takes is the help of Stripe and a hosted payment page, and you’re all set!

If you wish to discover more payment options, work with Payment Page! We’re a payment page builder integrated with Stripe, making it easier for business owners like you to diversify their business operations. Through our special WordPress plugin, you’ll be able to witness secure and reliable options, best fit for a growing business! 

Accept payments from all over the world with us—reach out to us for more information!

Categories
Stripe Tutorials

How to Accept SEPA Direct Debit Payments through Stripe: A Guide

Cashless payments in the European Union makes international commerce more accessible, which is the goal of the SEPA, or the Single Euro Payments Area. SEPA sets banking standards for direct debiting of Euro bank accounts in the region. Its direct debit system benefits businesses with customers in the EU, especially companies with recurring billing. 

How to make payments with SEPA Direct Debit

  1. At the checkout screen of the merchant’s website, the customer must select SEPA Direct Debit as the payment option. This action will take him to a hosted payment page.
  2. Next, the customer must provide his full name and account number in IBAN format. This has the country code, check digits, and the user’s Basic Bank Account Number.
  3. Once the bank details are verified, the customer will see a window notifying him that the transaction is complete.

Disputing a SEPA transaction is possible, and creditors maintain a “no questions asked” policy up to a point. SEPA automatically returns debit transactions to the customer if they make the dispute within eight weeks of the charge. 

After eight weeks, the customer may only dispute the payment if it is considered not authorized. In this case, the customer’s bank gets the mandate that the customer approved of the transaction. The bank also has the discretionary power to provide the customer with a refund.

If the customer’s bank is unable to debit the account because of insufficient funds or because it is frozen, the bank may reclaim the payment through a dispute as well. Decisions on SEPA Direct Debit disputes are final and may no longer be appealed.

Refunds of SEPA transactions

Refunds are only possible with SEPA within 180 days from the date of the charge. Refunds require three to four business days, and it may only be processed after the payment has been completed. If a merchant accidentally debits a customer, he should contact them immediately to prevent a dispute.

Refunds are not labeled as such when SEPA deposits money back to the buyer’s account. They process it as credit, and they include a reference to the original payment.

When issuing a refund, always inform customers that it takes five business days for the funds to clear. Long settlement periods mean a risk for confusion among the customer, the bank, and the merchant. For example, the customer might contact both his bank and the seller to dispute a transaction. If the seller issues a refund while the bank does the same, the customer might end up with two repayments for the same item.

What is a SEPA creditor identifier?

EU businesses need a SEPA creditor identifier, a uniform and standardized number that identifies the creditor clearly. Companies may have multiple creditor identifiers, but each one is unique and lets your customers locate their debit records  easily on their transaction history.

A creditor identifier also helps reduce disputed payments. You can request online for an identifier from your merchant bank. However, sellers need to specify that they are not seeking for the bank to process SEPA payments for them.

Conclusion

SEPA Direct Debit allows EU-based consumers to access their funds expediently. Integrating this payment method lets you provide more options to consumers from SEPA countries like France, Germany, Spain, Belgium, the Netherlands, and more.

Make paying for purchases even more convenient for shoppers by partnering up with Payment Page. Our hosted payment page integrates with various transaction methods, letting you provide a convenient e-commerce experience to shoppers. Join us today or get in touch to learn more about our payment page builder.